Master the Art of Steak Cooking with the Reverse Sear Technique
Achieve Juicy, Flavour-Packed Steaks with the Reverse Sear Method
Perfecting the reverse sear technique for steaks transforms traditional cooking methods, offering a fresh approach that promises succulent results. Unlike typical methods that start with a high-heat sear followed by oven cooking, the reverse sear method initiates with a low-temperature oven phase. This allows the steak to gradually attain the ideal internal temperature, ensuring uniform cooking throughout. Such meticulous attention guarantees maximum moisture retention, culminating in a delectably crispy crust when finished with a high-heat sear. This approach is especially advantageous for those aiming for impeccable steak dishes, resulting in a tender, juicy centre enveloped in a beautifully caramelised exterior that entices any meat lover.
By adopting the reverse sear method, you gain unparalleled control over your cooking, allowing your steak to achieve perfect doneness from edge to edge. This technique effectively circumvents the common problem of overcooked surfaces while preserving a delightfully rare centre. Particularly beneficial for larger cuts, reverse searing transforms an ordinary steak dinner into an extraordinary culinary triumph, making it a preferred method among both professional chefs and passionate home cooks aspiring for steak perfection.
Prefer To Listen?
Enhance Your Cooking Skills: Discover the Benefits of Reverse Searing
Embracing the reverse sear technique provides a multitude of advantages that can significantly improve your grilling prowess. One of the most notable benefits is the precise control it offers in achieving your desired level of doneness. Traditional grilling methods often lead to uneven cooking, where the outer portions become overcooked while the centre remains excessively rare. In contrast, the reverse sear method ensures that the meat gradually reaches its target temperature in a controlled environment, promoting consistent cooking throughout.
Moreover, the reverse sear method enhances the flavour profile of your steak. The initial low-temperature cooking phase allows the meat to develop deep and rich flavours. Simultaneously, the final searing stage initiates the Maillard reaction, which creates that coveted crust that seals in juices and adds complexity. This combination results in a delightful textural contrast that is challenging to replicate with traditional techniques.
Additionally, reverse searing is particularly forgiving for those who may feel uncertain about their cooking skills. Armed with a dependable meat thermometer, anyone can achieve restaurant-quality results right from their kitchen. This straightforward technique allows for greater flexibility, enabling you to engage with guests or prepare additional dishes while the steak cooks slowly in the oven.
Top Tips for Successfully Implementing the Reverse Sear Technique
The reverse sear technique is particularly well-suited for thicker steak cuts, typically those measuring at least 1.5 inches in thickness. Whether you opt for a luxurious ribeye, a tender filet mignon, or a robust porterhouse, these steak varieties significantly benefit from this cooking approach. The thickness of the cut guarantees that the interior has ample time to cook evenly without compromising the quality of the exterior.
This method is especially advantageous during grilling season, particularly in regions with colder climates where outdoor cooking can yield unpredictable results. By commencing the cooking process indoors, you can bypass the inconsistencies posed by fluctuating outdoor temperatures. Furthermore, reverse searing provides enhanced control over the cooking process, making it perfect for special occasions or dinner parties. Your guests will not only appreciate the quality of the steak but also admire your culinary confidence and skill.
By adopting the reverse sear technique, you can effortlessly create a gourmet steak dinner any time of the year. This method is ideal for holidays, family gatherings, or simply treating yourself, ensuring delectable results every time you try.
Selecting the Best Steak for Success with Reverse Searing

Optimal Steak Cuts for Perfecting the Reverse Sear Technique
When it comes to mastering the reverse sear technique for perfect steaks, selecting the right cut is paramount. Thicker steak cuts, such as ribeye, porterhouse, and filet mignon, are particularly well-suited for this cooking method. Each of these cuts possesses unique qualities that make them ideal candidates for reverse searing.
The ribeye, renowned for its rich marbling and intense flavour, is a favourite among steak enthusiasts due to its tenderness. The fat content within the ribeye melts during cooking, infusing the meat with moisture and flavour, resulting in a juicy and succulent steak. The porterhouse, celebrated for its combination of tenderloin and strip steak, offers the best of both worlds, making it a classic choice for reverse searing. The thickness of the porterhouse allows for a slow, low-cooking phase, followed by a high-heat sear that produces a stunning crust.
Filet mignon, cherished for its buttery texture, also shines with this technique. Although it is a leaner cut, reverse searing ensures it retains its juiciness while maintaining its delicate flavour. Perfect for special occasions, a flawlessly cooked filet mignon can become the highlight of any meal.
Each of these selections presents a distinct steak experience, making reverse searing a versatile option for meat lovers eager to explore culinary excellence.
Where to Source High-Quality Steaks for Exceptional Results
Sourcing premium-quality steaks is the first essential step towards successful reverse searing. Local butcher shops often serve as the best sources for top-notch cuts, as they typically provide a wider selection and more knowledgeable staff compared to standard grocery stores. In many urban areas across the United Kingdom, you can discover artisanal butchers who prioritise sourcing their beef from local farms, ensuring freshness and quality that you can trust.
Furthermore, specialty grocery stores, particularly those emphasising organic or grass-fed meat, are becoming increasingly popular. These retailers often boast a selection of cuts that are not only of superior quality but also more ethically sourced. For example, stores like Whole Foods and Trader Joe’s offer a variety of steaks that cater to diverse preferences and budgets.
If you prefer the convenience of online shopping, several reputable companies deliver high-quality steaks directly to your doorstep. Brands such as Omaha Steaks and Kansas City Steak Company have established their reputations for providing premium meats. Regardless of your location, you’re likely to find options that meet your needs and expectations.
A Comprehensive Guide to Understanding Beef Grading and Quality for Informed Meat Selections
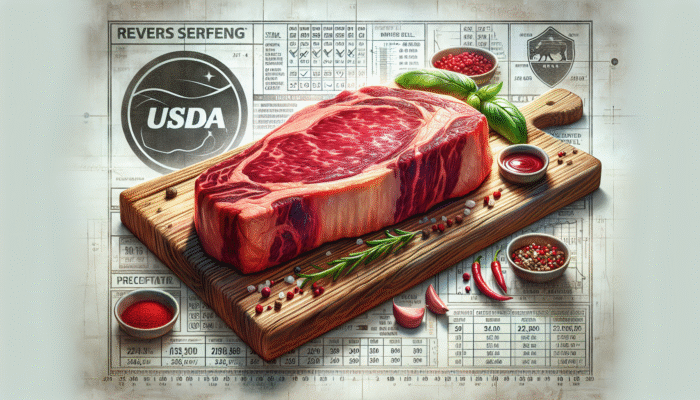
To make informed choices about which steaks to select for reverse searing, understanding the beef grading system is essential. The United States Department of Agriculture (USDA) assigns grades to beef based on factors such as marbling, colour, and texture. The three primary grades are Prime, Choice, and Select.
Prime beef, often reserved for upscale restaurants, represents the highest quality, showcasing abundant marbling that makes it exceptionally tender and flavourful. It’s an excellent choice for reverse searing, as the fat content enhances the overall taste and texture of the steak during cooking.
Choice beef remains a high-quality option widely available in grocery stores. Although it has less marbling than Prime, it remains tender and flavourful, making it suitable for reverse searing, particularly for home cooks seeking to balance quality with budget constraints.
Select beef, while leaner and typically less flavourful than the other grades, can still be used for reverse searing when seasoned appropriately. However, it may require extra attention during cooking to prevent dryness. By understanding these grading distinctions, you empower yourself to choose the best cut for your reverse-seared steak, ensuring optimal results every time.
Key Steps for Preparing Your Steak for the Reverse Sear Method
Effective Seasoning Techniques for Maximum Flavour Enhancement
Proper seasoning is crucial when mastering the reverse sear technique for perfectly cooked steaks. While it may be tempting to complicate matters with marinades and intricate rubs, simplicity often yields the best results. A straightforward seasoning of kosher salt and freshly cracked black pepper can elevate the natural flavours of the meat without overwhelming it.
Salt plays an essential role in enhancing the flavour of the steak. It helps draw out moisture, allowing the surface to develop a beautiful crust during the searing phase. Generously applying salt—ideally at least 40 minutes before cooking—allows it to penetrate the meat, ensuring flavour in every delectable bite. Freshly cracked black pepper adds a hint of spice, balancing the richness of the beef.
If you wish to experiment, consider adding garlic powder or smoked paprika for an additional layer of flavour. However, exercise caution with overpowering spices, as they can mask the steak's inherent taste. The objective of seasoning is to enhance, not overshadow, the natural flavours of the meat.
Allowing Your Steak to Reach Room Temperature for Even Cooking
Allowing your steak to reach room temperature before cooking is a crucial step in achieving the perfect reverse sear. This practice promotes even cooking throughout the meat, reducing the risk of a cold centre during the searing phase.
When a steak is taken directly from the refrigerator, its interior is significantly colder than the exterior. Cooking it straight from cold can lead to the exterior cooking too quickly while leaving the centre underdone. By allowing the steak to sit out for about 30 to 60 minutes before cooking, you can ensure a more uniform cook that enhances the overall flavour and tenderness.
This practice is particularly critical for thicker cuts, which require more time to reach the desired temperature. Additionally, it promotes better seasoning absorption, further enhancing flavour. A well-prepared steak will yield superior results, whether you're cooking for yourself or impressing guests at a dinner party.
Essential Tools and Equipment for Successfully Executing the Reverse Sear
Having the right tools and equipment is crucial for executing a successful reverse sear. At the forefront is a reliable oven capable of consistently maintaining low temperatures. An oven thermometer can be beneficial to ensure accuracy in temperature settings, particularly since some ovens may be off by a significant margin.
A high-quality meat thermometer is another indispensable tool in your cooking arsenal. This device enables you to monitor the internal temperature of the steak with precision, ensuring you achieve your desired doneness without the risk of overcooking. Opting for a digital thermometer provides quick and accurate readings that are essential for success.
For searing, a heavy skillet is ideal; both cast-iron and stainless-steel models work exceptionally well. They can withstand high heat and distribute it evenly, creating that beautiful crust on the steak. Lastly, tongs are necessary for safely handling the steak and ensuring an even sear without piercing the meat and losing valuable juices.
Equipping yourself with these essential tools will streamline the cooking process and help you achieve the best results with your reverse-seared steak.
Preheating Your Oven for Optimal Cooking Conditions
Preheating the oven is a crucial step in the reverse-sear process. Setting your oven to a low temperature—around 200°F to 250°F—allows the steak to cook slowly and evenly, promoting tenderness and flavour. This temperature range is perfect for gradually bringing the steak to the desired internal temperature without the risk of overcooking.
Before placing your steak in the oven, ensure it is completely preheated. An uncalibrated or cold oven can result in uneven cooking, leaving you dissatisfied with the outcome. The initial cooking phase typically lasts anywhere from 30 minutes to an hour, depending on the steak's thickness and your desired doneness.
During this phase, it’s also wise to closely monitor the internal temperature. Using a meat thermometer will help you track the steak’s progress, allowing you to remove it from the oven once it reaches about 10-15°F below your target temperature. This approach guarantees that your steak will be perfectly cooked after the searing stage, as the residual heat continues to rise.
Executing the Reverse Sear Technique with Precision and Confidence
Slowly Cooking Your Steak for Optimal Flavour Development
The initial phase of attaining the perfect reverse sear for your steak involves cooking it slowly in the oven. This process begins by placing the seasoned steak on a wire rack set atop a baking sheet, allowing air to circulate around the meat. This setup promotes even cooking and prevents steaming, which can occur if the steak is directly placed on a pan.
Set your oven to the desired low temperature, generally between 200°F and 250°F, and insert the tray with the steak. The slow cooking process enables the steak to reach an even internal temperature. For instance, a one-and-a-half-inch-thick ribeye will take approximately 30-40 minutes to achieve the perfect medium-rare temperature of around 130°F.
During this time, it’s essential to monitor the internal temperature using a meat thermometer. As the steak approaches the target temperature, anticipation builds for the final sear. This low-and-slow method not only ensures even cooking but also creates an ideal canvas for the subsequent sear, resulting in a perfectly cooked steak that’s bursting with flavour and juiciness.
Creating a Perfect Crust Through Searing
Once your steak has cooked low and slow to the desired internal temperature, it’s time to create that perfect crust through searing. Preheat your heavy skillet over high heat until it is smoking hot. The key to a successful sear is having the skillet at the right temperature; it must be hot enough to initiate the Maillard reaction, resulting in that striking brown crust.
Carefully place the steak in the skillet and refrain from moving it for the first 1-2 minutes. This allows the crust to develop without interference. Once you achieve a deep, rich colour on one side, flip the steak to sear the other side, using tongs to hold it in place for an even sear along the edges.
Searing typically takes about 2-3 minutes per side, depending on the steak's thickness and your preferred level of doneness. To enhance flavour, consider adding a tablespoon of butter, garlic, or fresh herbs such as thyme or rosemary to the pan during the final minute of cooking. Tilt the skillet and use a spoon to baste the steak with the melted butter, infusing it with even more flavour.
This finishing touch elevates the overall taste and creates an unforgettable dining experience that will leave a lasting impression.
The Importance of Allowing Your Steak to Rest for Maximum Juiciness
After achieving a perfect sear, resist the urge to cut into your steak immediately. Resting is a critical step in the cooking process, allowing the juices to redistribute throughout the meat. When a steak cooks, the juices are pushed towards the centre, and cutting into it right away causes them to escape, resulting in a dry steak.
Allow your steak to rest for about 5-10 minutes on a cutting board, loosely tented with aluminium foil to keep it warm. This resting period not only guarantees juiciness but also enhances the flavour as the meat relaxes and absorbs its juices.
You can also utilise this time to prepare any sides or sauces that will complement your steak. When ready to serve, slice against the grain for maximum tenderness, and you’ll have a beautifully cooked reverse-seared steak that’s brimming with flavour and ready to delight.
Steps for Preparing Your Steak Before Cooking with Precision
Preparing your steak prior to the reverse sear process involves several key steps that can significantly influence the outcome. First, ensure the steak is completely thawed if it was previously frozen. Place the steak on a plate and season it generously with kosher salt and freshly cracked black pepper. Allow it to sit for at least 40 minutes to an hour at room temperature.
This resting time is crucial; it allows the steak to warm slightly, resulting in more even cooking. While you wait, take the opportunity to prep your cooking space—gather your tools, preheat the oven, and prepare your pan for searing.
Additionally, consider giving your steak a light pat-dry with a paper towel. This will help achieve a better crust during the searing phase, as excess moisture can hinder the development of the coveted Maillard reaction. Taking these preparatory steps will set you up for success as you embark on the journey of mastering the reverse sear for perfect steaks.
Selecting the Right Cut of Meat for Optimal Reverse Searing Results
Choosing the appropriate cut of meat is pivotal when reverse-searing. The thickness and quality of the cut will significantly impact the final result. As previously mentioned, thicker cuts, such as ribeye, porterhouse, and filet mignon, are the best choices, ideally measuring at least 1.5 inches thick to benefit from the reverse sear method fully.
When shopping, look for steaks with good marbling, as this fat content will render during cooking, adding moisture and flavour. A prime-grade steak is an excellent option for those looking to indulge, while choice-grade cuts can still deliver satisfying results, especially when prepared correctly.
Once you’ve selected your cut, ensure it is fresh and has a vibrant red colour. Avoid any steaks with brown spots or an unpleasant odour. Choosing the right cut is the first step towards achieving success, so take your time to select a quality piece of meat that will excel when you apply the reverse sear technique.
Elevating Your Steak Presentation and Accompaniments
Selecting Ideal Sides to Enhance Your Steak Meal
When it comes to serving a reverse-seared steak, the choice of sides can significantly enhance the overall dining experience. Classic pairings such as creamy mashed potatoes, grilled asparagus, or roasted Brussels sprouts beautifully complement the rich flavours of the steak. The smooth texture of mashed potatoes balances the boldness of the meat, adding a comforting element to the meal.
Grilled vegetables introduce a refreshing touch and a slight smokiness that elevates the overall flavour profile. Seasonal vegetables, such as zucchini or bell peppers, can be tossed with olive oil, salt, and pepper, then grilled alongside the steak for a delightful accompaniment that complements the meal.
For a more sophisticated presentation, consider serving your steak with a side salad drizzled with a balsamic reduction or a zesty chimichurri sauce. These additions not only enhance the taste but also add a vibrant pop of colour to your plate, creating a visually appealing dining experience.
Offering a variety of sides ensures that your meal is well-rounded and caters to diverse palates, allowing guests to create their perfect bite with each forkful, truly enhancing the enjoyment of the meal.
Selecting the Perfect Wine to Pair with Your Steak for an Elevated Experience
Choosing the right wine to accompany your reverse-seared steak can elevate the entire dining experience. A robust red wine, such as Cabernet Sauvignon, is an excellent choice due to its bold tannins and rich flavour profile. The structure of the wine complements the hearty flavours of the steak, creating a harmonious balance on the palate that enhances both the food and the drink.
Merlot serves as another fantastic option, offering a slightly softer approach to pairing without sacrificing depth. The fruit-forward characteristics of Merlot enhance the typical flavour notes of a reverse-seared steak, bringing out its natural sweetness and richness.
For those who prefer white wine, a full-bodied Chardonnay with oaky undertones can also be a good match, especially if your steak is served with buttery sides. The richness of a well-chosen wine can elevate the meal and create a memorable experience for your guests, enhancing their enjoyment of the dining occasion.
Don’t hesitate to explore and experiment with different wine pairings to discover what works best for your palate and preferences, as this can lead to delightful culinary discoveries.
Presentation Techniques for an Impressive Steak Dinner Experience
The presentation of your reverse-seared steak is a crucial aspect of the overall dining experience. Start by slicing the steak against the grain to ensure maximum tenderness. This technique disrupts the muscle fibres, making each bite easier to chew and enhancing the enjoyment of the meal.
When plating, elegantly arrange the steak on a warm plate. Consider layering your sides artistically, positioning them alongside the steak to create a visually appealing display that enhances the dish's presentation. You might also drizzle a small amount of sauce or herb oil around the plate for added flair and sophistication.
Garnishing with fresh herbs, such as rosemary or parsley, adds a splash of colour and a hint of freshness that elevates the visual presentation. Remember, we eat with our eyes first, so putting thought into the presentation will significantly enhance the overall experience of your perfectly cooked reverse-seared steak.
Addressing Common Challenges in Reverse Searing with Confidence
Preventing Overcooking Your Steak for Perfect Results
One of the most common pitfalls when mastering the reverse sear for perfect steaks is the risk of overcooking. This can occur if the internal temperature of the steak is not monitored carefully. To prevent this issue, invest in a reliable meat thermometer that allows you to monitor the temperature throughout the cooking process.
As a general guideline, remove the steak from the oven when it reaches approximately 10-15°F below your desired doneness; it will continue to cook while resting. For a medium-rare steak, aim for an internal temperature of around 130-135°F to achieve that perfect level of doneness.
Another useful tip is to adjust the cooking time according to the steak's thickness. Thicker cuts will require longer cooking durations, while thinner cuts need less time. By closely monitoring temperature and cooking time, you can consistently achieve a perfectly cooked steak without the fear of overcooking.
Creating the Ideal Crust on Your Steak for Enhanced Flavour
Achieving that perfect crust during the searing phase is essential for the success of your reverse-seared steak. If the skillet isn’t hot enough, you risk ending up with a lacklustre crust. Preheating your skillet until it's smoking hot is crucial for developing a beautiful crust.
Utilising a heavy-bottomed skillet allows for optimal heat retention, ensuring that the steak sears beautifully. If you find that the crust isn’t forming as expected, it may also be due to excess moisture. Patting the steak dry before seasoning helps eliminate moisture, allowing for better caramelisation during searing.
Additionally, consider adding a small amount of oil with a high smoke point, such as grapeseed or canola oil, to your skillet before adding the steak. This will help prevent sticking and further enhance the crust's development. With the right approach, you can achieve that coveted crust that makes your reverse-seared steak truly divine.
Ensuring Uniform Cooking Throughout Your Steak for Consistent Results
To achieve even cooking when reverse searing, consider the placement of your steak in the oven. Centre it on the rack to promote uniform heat circulation, ensuring that all sides cook evenly. If you notice that your steak is not cooking evenly, consider rotating it halfway through the cooking process to ensure even cooking. This simple adjustment can help guarantee that all areas receive equal exposure to heat.
Another important factor to consider is the thickness of your steak; thicker portions may take longer to cook than thinner sections. For best results, invest in a meat thermometer to accurately track the internal temperature. This will allow you to identify any uneven cooking and make necessary adjustments promptly.
If you discover that your steak has cooked unevenly after searing, don’t worry—return it to the oven at a low temperature for a few minutes until it reaches your desired doneness. This will help rectify any issues and ensure a satisfying dining experience.
Managing Variations in Steak Thickness for Perfect Cooking
Steak thickness plays a crucial role in the reverse sear process. Different cuts can vary significantly in thickness, so it’s essential to adjust the cooking time accordingly. A general rule of thumb is to allocate about 20-25 minutes per inch of thickness when cooking at low temperatures.
If you’re working with a particularly thick steak, you may need to extend the cooking time to ensure it reaches the desired internal temperature. Conversely, if your steak is thinner, reduce the time to prevent overcooking and ensure optimal results.
Using a meat thermometer is the most accurate method for monitoring doneness without guesswork. Removing the steak from the oven when it’s slightly below your target temperature will help prevent overcooking during the searing phase. By keeping these considerations in mind, you can ensure that every steak you cook is perfectly tender and juicy.
Preventing Dryness in Lean Cuts of Steak for a Juicy Outcome
While reverse searing is a fantastic technique for many cuts, leaner steaks can sometimes risk dryness. To prevent this from happening, consider marinating the steak before cooking, as this will add moisture and enhance its flavour. A simple marinade, consisting of olive oil, vinegar, and spices, can improve the steak’s tenderness and moisture retention.
Another effective method is to apply a fat-based rub, such as one made with butter or bacon fat, before cooking. This fat will render during the cooking process, helping to keep the steak juicy and flavourful.
Finally, be vigilant throughout the cooking process to ensure you don’t overcook lean cuts. Utilising a meat thermometer is vital to help you achieve the perfect doneness while retaining moisture. By taking these steps, you can ensure that even leaner cuts turn out succulent and delicious, providing a satisfying dining experience.
Your Frequently Asked Questions About Reverse Searing
What is the reverse sear technique?
The reverse sear technique involves cooking steak at low temperatures in the oven before finishing it with a high-heat sear in a skillet. This method ensures even cooking while creating a perfect crust on the outside of the steak.
Which steak cuts are optimal for reverse searing?
Thicker cuts, such as ribeye, porterhouse, and filet mignon, are ideal for reverse searing, as they greatly benefit from the even cooking and flavour development this method offers.
How should I season my steak for reverse searing?
A simple seasoning of kosher salt and freshly cracked black pepper is ideal for enhancing the steak's natural flavours. Allow the seasoned steak to rest at room temperature for optimal flavour absorption.
Why is it important to rest the steak after cooking?
Resting allows the juices to redistribute throughout the steak, preventing dryness and ensuring a juicy, flavourful experience when sliced and served.
How can I achieve a perfect crust on my steak?
Ensure your skillet is smoking hot before adding the steak. Avoid moving it for the first couple of minutes to allow a proper crust to develop on the surface.
What should I do if my steak is overcooked?
To prevent overcooking, use a meat thermometer to monitor the internal temperature closely. If overcooked, return the steak to a low-temperature oven to gently reheat it without further cooking.
Is it possible to use thin cuts of steak for reverse searing?
While reverse searing is best suited for thicker cuts, you can still use thinner cuts; however, you will need to adjust the cooking time accordingly to prevent overcooking.
Should I marinate lean cuts before reverse searing?
Yes, marinating lean cuts can enhance moisture and flavour, helping to prevent dryness during the cooking process. This will improve the overall eating experience.
How long should I cook a steak in the oven for reverse searing?
Cooking time varies based on thickness, but generally takes about 20-25 minutes per inch of thickness at low temperatures to achieve the desired doneness.
What type of wine pairs well with reverse-seared steak?
A robust red wine, such as Cabernet Sauvignon, pairs excellently with reverse-seared steak, enhancing the rich flavours of the meat and providing a delightful complement to the meal.
Connect with us on Facebook for more culinary insights!
The Article Mastering the Reverse Sear for Perfect Steaks appeared first on https://pitmastersarsenal.com
The Article Reverse Sear for Perfect Steaks: Master the Technique Was Found On https://limitsofstrategy.com